Donkey Car
Before You Begin
There are several steps where it's possible to destroy the Raspberry Pi, the camera, or other expensive parts of the kit. Please don't rush! Read these instructions carefully, and check before making any soldered connections, attaching the camera, or attaching power.
WARNING Do NOT connect or disconnect items such as the servo or speed controller while power is applied. During testing we accidentally destroyed several servos by doing this. Make sure everything is powered down before doing ANY work on the car.
Parts Required
There are 4 major items included in your kit:
1. 1/16th scale RC car chassis, with a steering servo, a motor speed controller, and a NiMH battery. 2. Battery charger with AU adapter. 3. White rectangular laser-cut corflute base plate. 4. A bag of small parts.
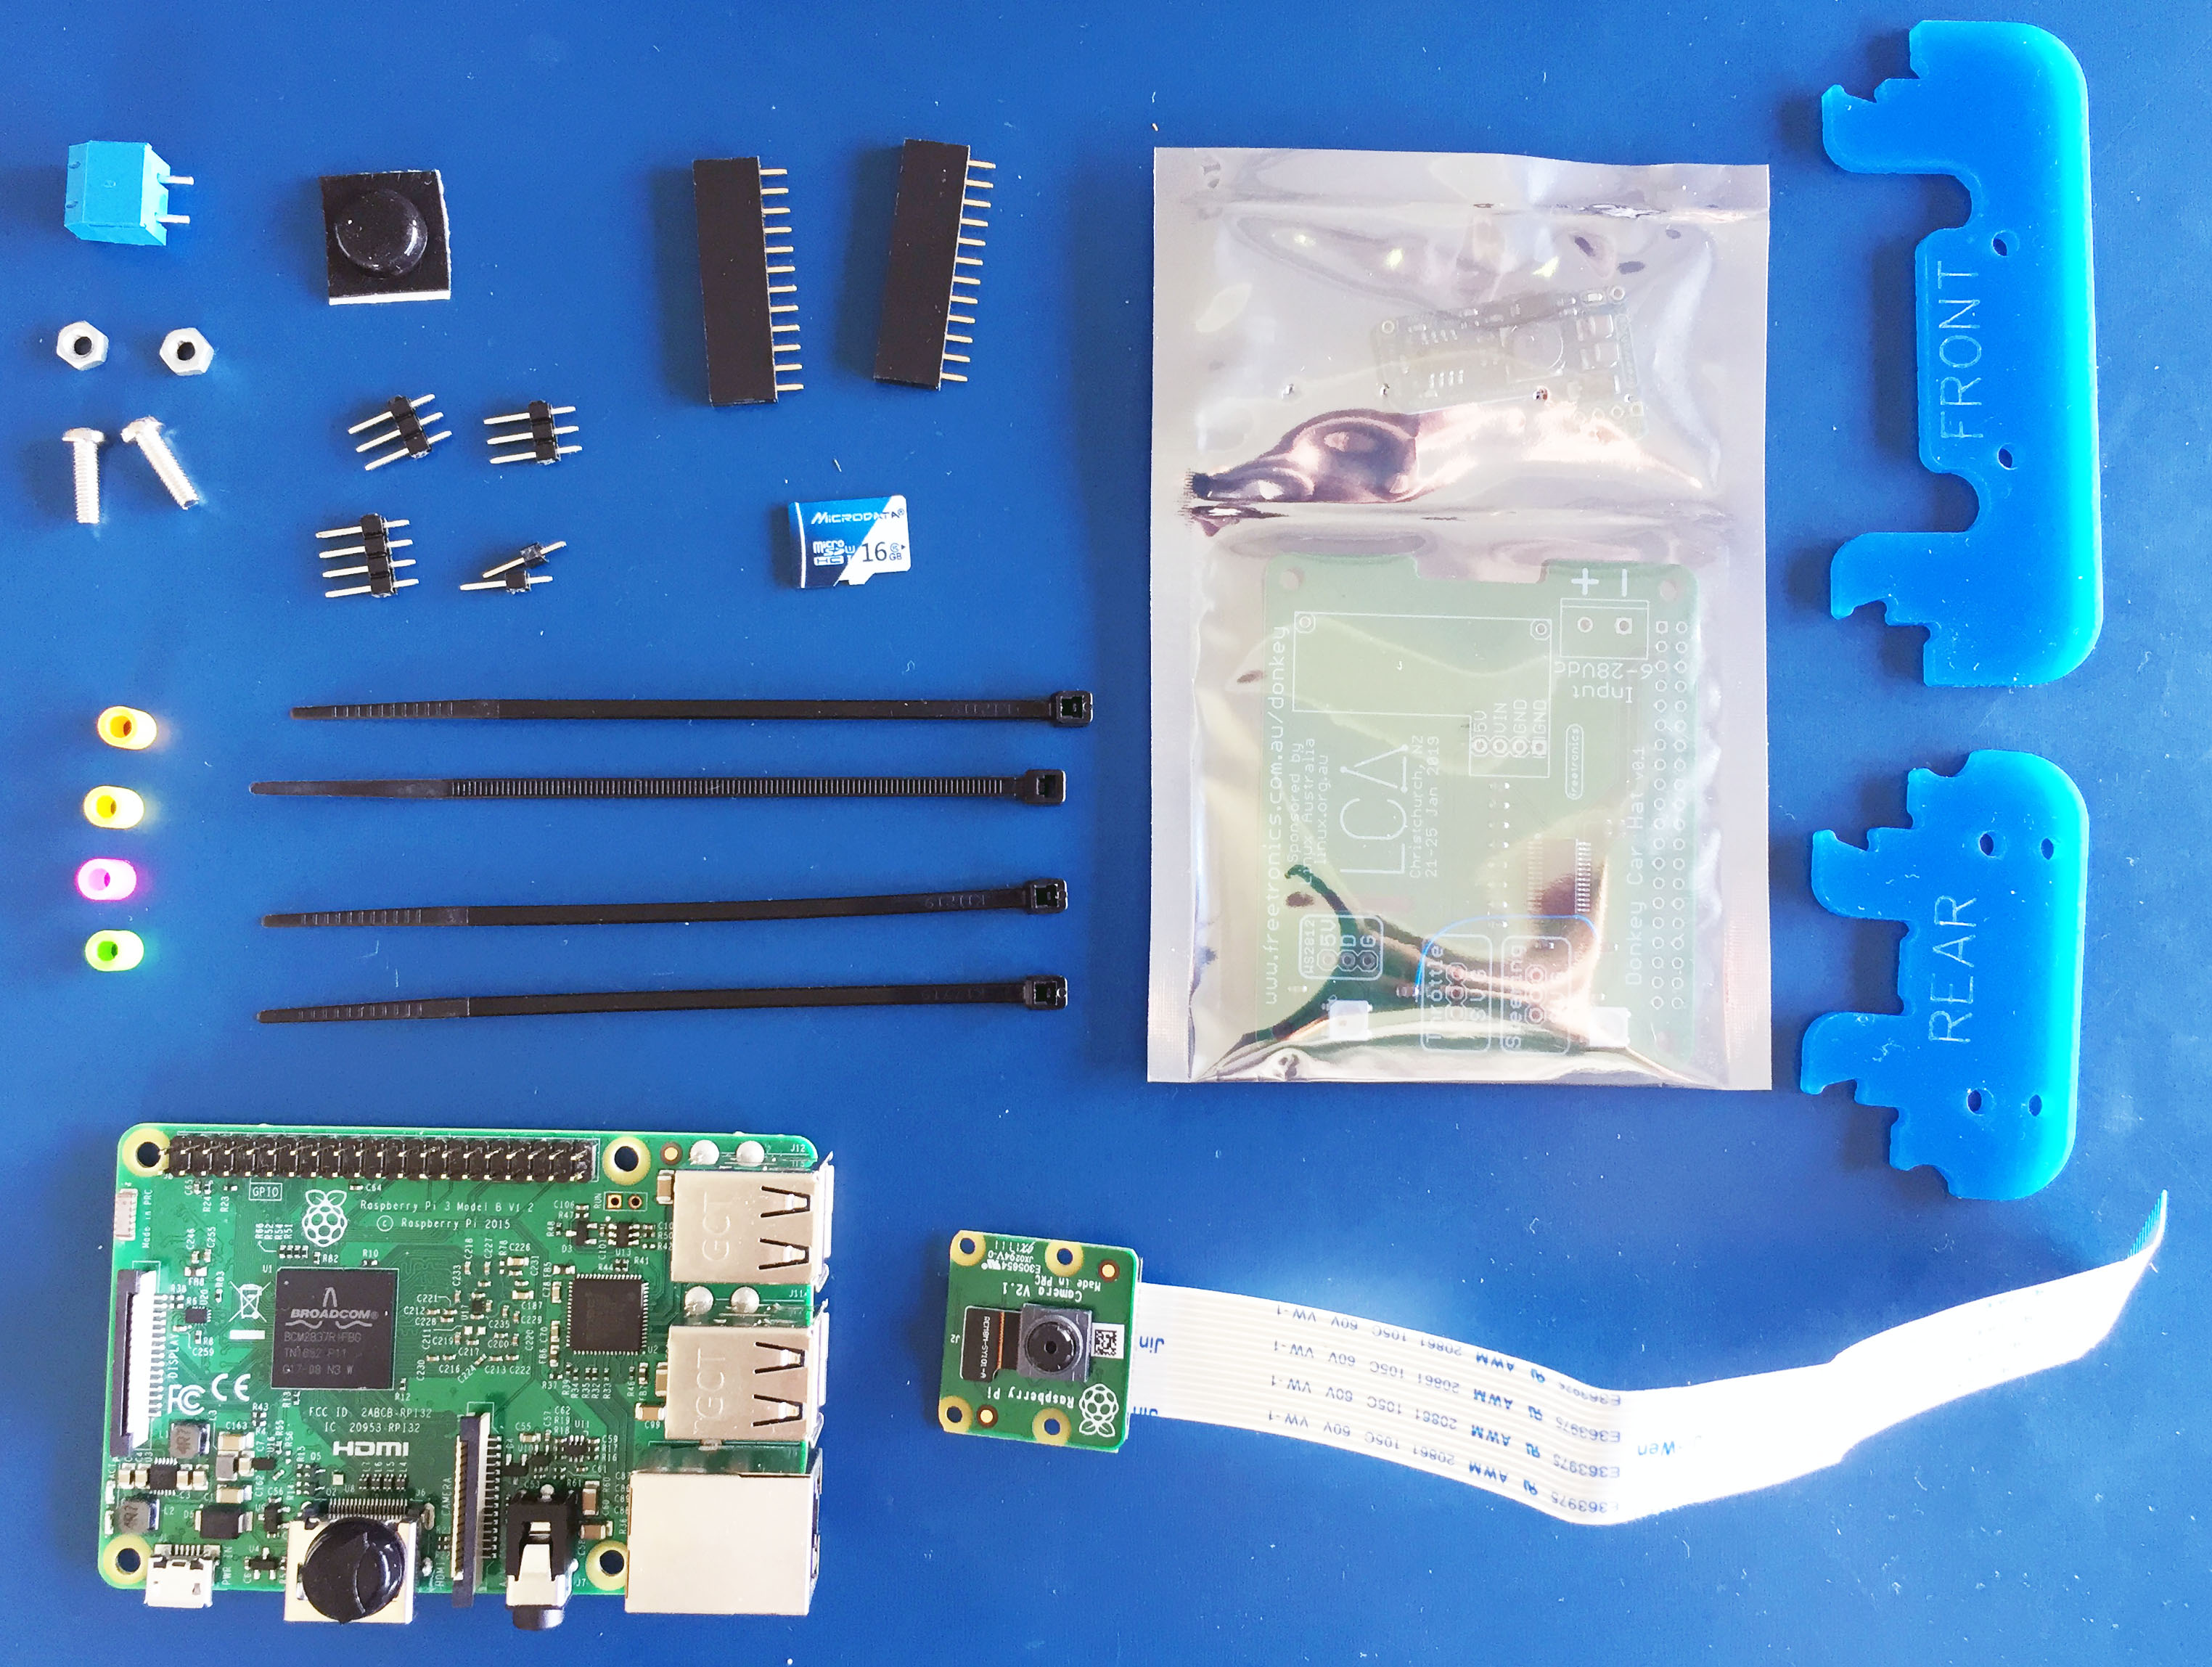
The bag should contain:
* 1 x Raspberry Pi model 3
* 1 x Raspberry Pi camera and flex cable
* 1 x Donkey Car Hat for Raspberry Pi (in anti-static bag)
* 1 x Freetronics PR28V voltage regulator, already configured for 5V output (in anti-static bag)
* 1 x laser-cut corflute bracket
* 2 x blue laser-cut brackets
* 1 x 5mm 2-way screw terminal
* 4 x small cable ties
* 4 x plastic spacers
* 2 x 12-way header sockets
* 1 x 4-way pin header
* 2 x 3-way pin headers
* 2 x 1-way pin headers
* 2 x 10mm M3 bolts
* 2 x M3 nuts
You will also be given a micro SD card and adapter separately, pre-loaded with Raspbian and the necessary software.
