Difference between revisions of "AMC2013"
(Created historical page) |
|||
| (One intermediate revision by the same user not shown) | |||
| Line 1: | Line 1: | ||
| + | {{DISPLAYTITLE:Arduino Miniconf 2013: Canberra, Australia}} | ||
== Email list == | == Email list == | ||
Latest revision as of 01:49, 19 September 2014
Contents
Email list
To stay in contact between conferences, the following Google Group email list has been set up. This will be good for technical support, letting each other know what we've done with our projects and preparation for the next Arduino Mini-Conference, LCA2014 in Perth.
Arduino Miniconf 2013
What
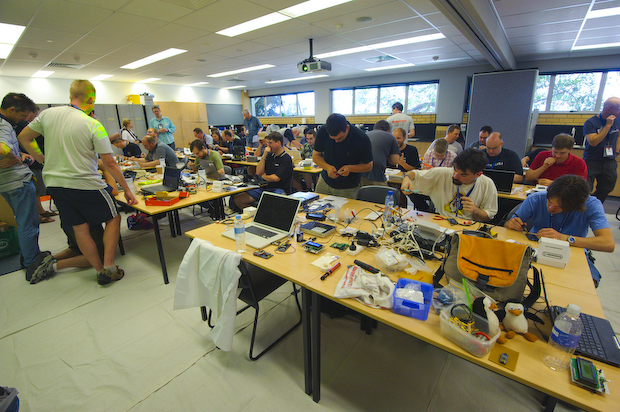
The Arduino Miniconf is a 1-day event that runs in conjunction with the linux.conf.au conference. It gives participants an opportunity to learn basic hardware skills such as soldering, by assembling their own Arduino-compatible project, and then the afternoon is filled with interesting talks about various projects and techniques related to Arduino and open hardware in general. To give you some idea what to expect, this is the hardware assembly session at the 2011 Arduino Miniconf:
(Photo by Andrew McMillan, CC2.0)
After the assembly session is over the room is cleaned up a bit and the talks begin. It's a fun and educational event!
When
Monday, January 28th, 2013, promptly after the LCA opening ceremony and morning tea. Please don't be late!
Where
Canberra, as part of linux.conf.au. Note that to attend you must first register for the main conference, which provides the venue. The Arduino Miniconf is part of LCA as a specialist stream for conference attendees: it's not a stand-alone event. See https://lca2013.linux.org.au/wiki/Miniconfs/Arduino for more information.
Map to the venue ("Location X") There will be volunteers to help people get there from other venues.
Registration And Cost
Attendance is free (to linux.conf.au delegates) but if you wish to participate in the morning hardware assembly tutorial you will need to pre-register and purchase a kit for $110. Space is limited so get in fast! If you just want to come along and watch or attend the talks, you don't need to do anything. If you wish to participate in the hardware assembly tutorial, please submit the registration form:
Registration is now closed.
Schedule
- 10:40 - 11:25 HackCNC workshop 1 (assembly)
- 11:25 - 11:35 Break
- 11:35 - 12:20 HackCNC workshop 2 (assembly)
- 12:20 - 1:20 Lunch
- 1:20 - 1:45 Talk 1: HackCNC mechanicals / software - John Spencer
- 1:45 - 2:10 Talk 2: HackCNC electronics - Luke Weston
- 2:10 - 2:20 Break
- 2:20 - 2:40 Talk 3: Shanghai HackerSpace projects - Ricky Ng-Adam
- 2:40 - 3:00 Talk 4: Alastair D'Silva
- 3:00 - 3:40 Afternoon Tea
- 3:40 - 4:00 Talk 5: Writing and optimizing Arduino libraries - Andy Gelme
- 4:00 - 4:20 Talk 6: Process control glue - Mike O'Connor
- 4:20 - 4:30 Break
- 4:30 - 4:50 Talk 7: Jon Oxer
- 4:50 - 5:20 Lightning Talks (and project showcase)
- 5:20 Close
Hardware Assembly Project: HackCNC (basic X/Y mill/plotter)
Kit on-line ordering
The CNC Stepper Motor Controller will be available for on-line purchase at Freetronics.
The mechanical parts are currently unavailable for purchase whilst the design, logistics and cost of making this kit are determined.
All HackCNC design and documentation is open-source, so you can build your own ...
Assembly instructions
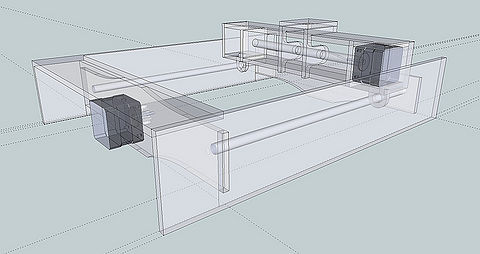
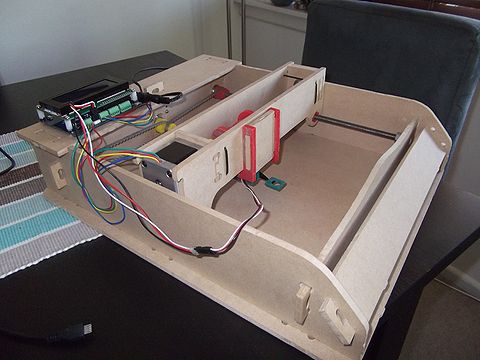
The hardware assembly project this year is something very special: not just assembling a PCB, it's a whole mechatronic box of magic. You'll get to assemble the electronics, stepper motors, a servo, a pre-cut timber chassis, and have access to the design files and (of course!) all the source code for the firmware to drive it. Meet HackCNC, the Open Hardware X/Y platform:
 (A Render of an early prototype)
The chassis, called "HackCNC", was designed by John Spencer as an easy-to-assemble X/Y platform. It uses threaded rod and two stepper motors to move a toolhead in X and Y axes, and has a servo motor to allow something light such as a marker pen to be moved up and down in the Z axis. The base is large enough to comfortably fit an A4 sheet of paper. The chassis itself has been cut from MDF using a CNC machine, and prepared so that you can clip it together in minutes. It can also be disassembled for easy packing for you to take it home afterwards. The chassis also uses plastic brackets and clips that have been printed on a 3D printer, and all the design files for those are available as well.
Features:
- Threaded rod X/Y drive mechanism.
- Simple assembly with minimal tools.
- All plastic parts can be produced using a 3D printer such as a RepRap or Makerbot.
- Uses commonly available hardware such as threaded rods and bearings.
HackCNC is intended to be a starting point: it gives you the basic structure of an X/Y platform that you can then adapt to your own projects. We'd love to see what people come up with!
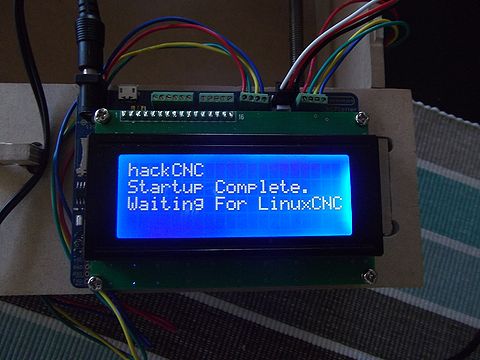
The matching control board, called "CNCPlot", was designed by Luke Weston and produced by Freetronics specially for the Arduino Miniconf:
Features:
- Arduino Leonardo compatible
- Two onboard stepper motor drivers
- One onboard servo driver
- 20x4 LCD
- microSD card slot
- Breakout connector for Nintendo DS touchscreen (not included)
The CNCPlot board was designed specifically to drive the HackCNC chassis, but it's also an extremely flexible general purpose board that would be brilliant for other projects involving stepper motors.
The CNCPlot board uses many surface-mount parts, so those have all been pre-fitted. You will only need to fit standard "through-hole" parts, so the soldering skill required is minimal. This project is therefore suitable for a beginner, even though the end result will be a very capable board. It may look scary and complicated, but don't worry, most of the parts will already be on the board.
The complete HackCNC kit will be $110, which includes everything required: parts for the mechanical chassis, the CNCPlot controller, the display, power supply, steppers, servo, even a USB cable.
Joshua Mesilane has some videos of getting the hackCNC running in OSX that give a good overview of it working.
HackCNC running under OSX (sortof) part 1
HackCNC running under OSX (sortof) part 2
Get the assembly instructions at HackCNC Assembly Tips


